
Cara Render Video di Adobe Premiere untuk YouTube
That would necessarily involve either boxes to either side, or cropping your video's top and bottom, of course. That said. To the Menu bar, "Sequence/Sequence Settings". and from the list of options, you could change the top one, "Editing mode", selecting an option from the drop down that's a 16:9 (1920x1080 or 1280x720 would do) or you could go down a bit farther, and change the frame.
Cara Render Premiere Pro 1080p Render Settings for Adobe Premiere Pro CS6 YouTube / While
Name and Save your sequence settings preset, " TikTok Video" so you can start with the right formatting for next time. Click " OK. Then click " OK " again to start editing on Adobe Premiere for vertical video. Now it's time to import your video for editing. Go to File > Import or just CTRL + I.

Apa Itu Render Video Ujian
Render video di Adobe Premiere CS6 membutuhkan beberapa langkah dan pengaturan yang harus diperhatikan. Pastikan Anda sudah menyiapkan sequence dengan baik, memilih format output yang sesuai, menentukan pengaturan render yang tepat, dan memperhatikan aspek-aspek lainnya seperti audio, aspect ratio, dan frame rate.

Adobe Premiere Pro CS6 Full HD 60FPS Video Nasıl Render Alınır? YouTube
Premiere Pro I Cara Render Video di Adobe Premiere I How to Render Video-----Leave a LIKE if you enjoy.

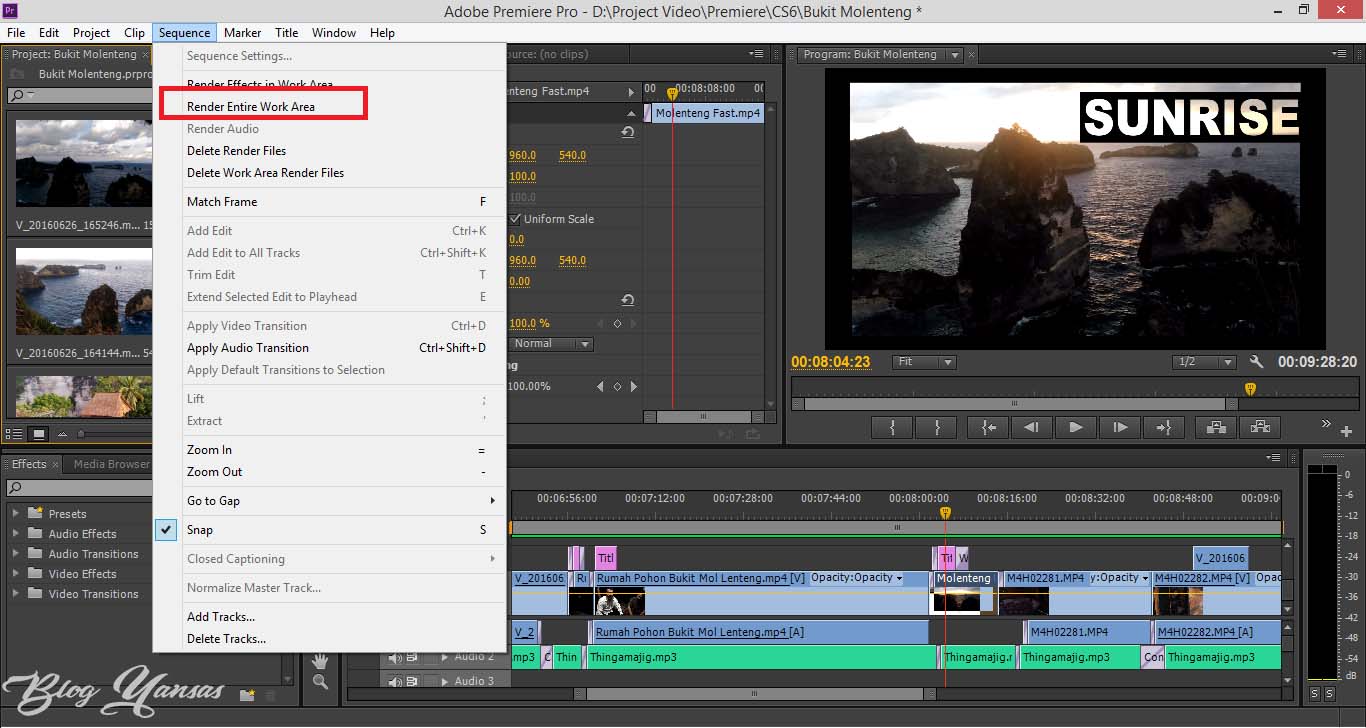
2 Cara Rendering Video Di Adobe Premiere Pro CS6 (mengubah project menjadi video)
Like Hardware-accelerated Encoding, Adobe Premiere Pro also supports Hardware-accelerated Decoding to provide better playback performance while working with the H.264/AVC, HEVC media in the timeline. Steps to enable Hardware-accelerated Decoding: Navigate to Preferences > Media . Select Enable hardware accelerated decoding (requires restart).
Cara Render Video di Adobe Premiere untuk YouTube
Social MediaTwitter - @agung_hapsahFacebook - http://facebook.com/filmhakInstagram - agunghapsahAsk.Fm - @AgungHapsahCreditsMusic - http://www.bensound.com

Cara Render Video di Adobe Premiere Pro CS6 Dengan Cepat Blog Yansas
In the Effects panel, search for "crop" or go to Video Effects › Transform › Crop. Double-click the Crop effect to apply it to the selected clip. 3. Crop your clip. Select the Crop effect in the Effect Controls panel and then drag the handles in the Program Monitor to crop your video. You can also adjust the numeric controls to make a.
Cara Render Video di Adobe Premiere CS6
Cara Save Video di Adobe Premiere. Ketika pertama kali menggunakan aplikasi Adobe Premiere pastinya masih asing dengan tampilan aplikasi yang cukup rumit tersebut, termasuk juga dengan bagaimana cara save video di Adobe Premiere.Cara menyimpannya tentu tidak hanya dengan sekali tekan "save" langsung tersimpan seperti pada aplikasi lainnya.
2 Cara Rendering Video Di Adobe Premiere Pro CS6 (mengubah project menjadi video)
Adobe Premiere Pro CS6 video tutorials from Andrew Devis and Scott Simmons . Free sample video tutorials from Adobe Premiere Pro CS6: Learn By Video (HTML). Timeline trimming in Premiere Pro CS6. Smart Rendering in Premiere Pro CS6 (6.0.1, and later) Alternatives to the jog shuttle controls in Premiere Pro CS6.
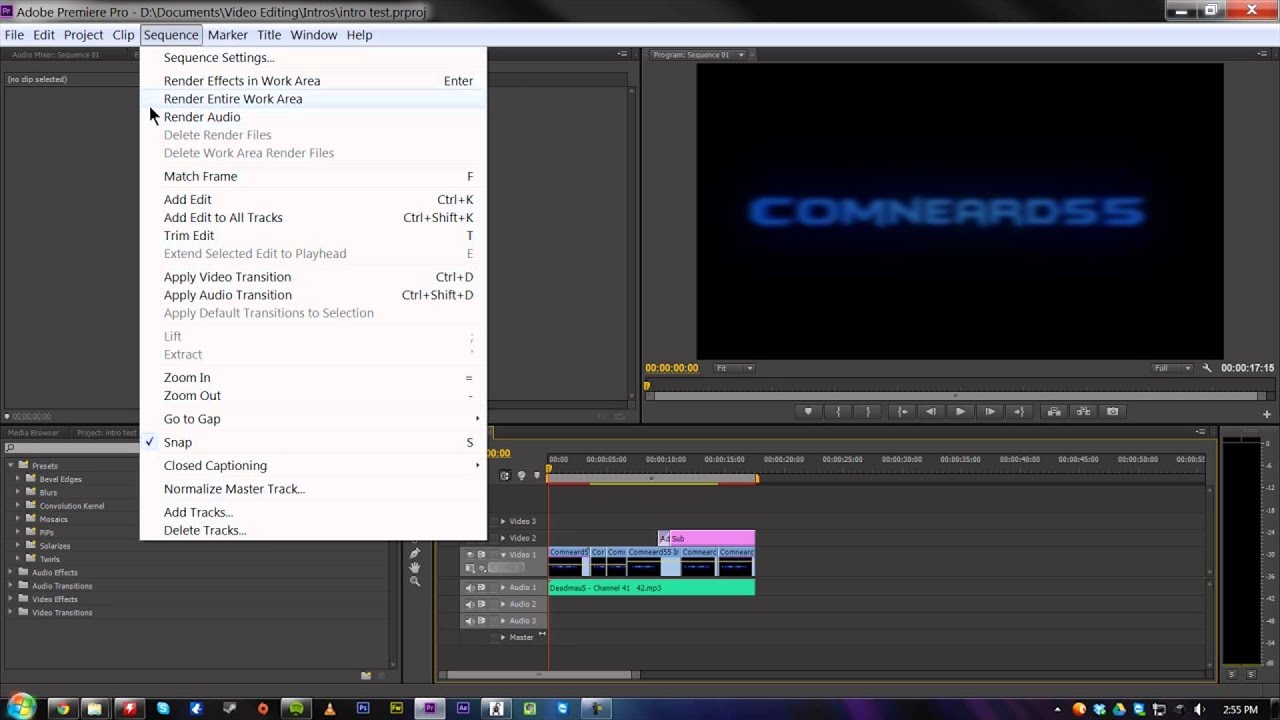
Rendering sequences/work areas in Adobe Premier Pro CS6 YouTube
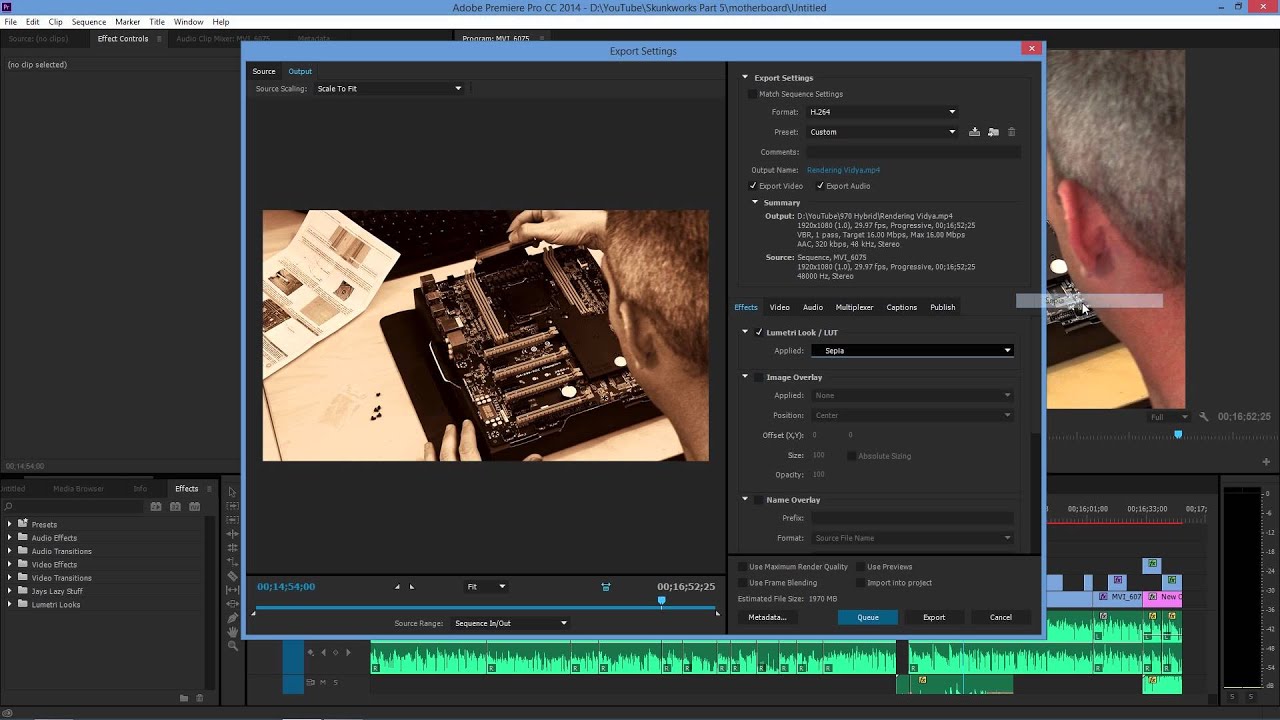
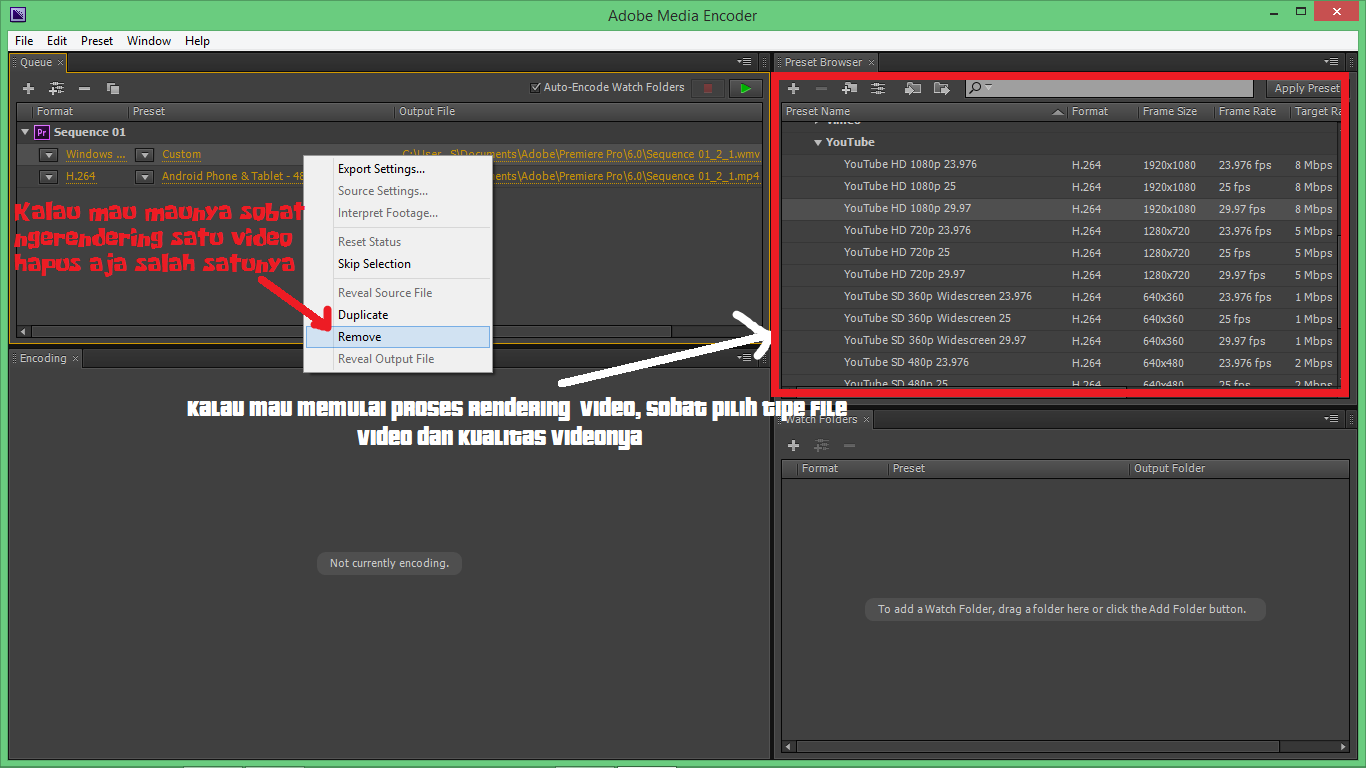
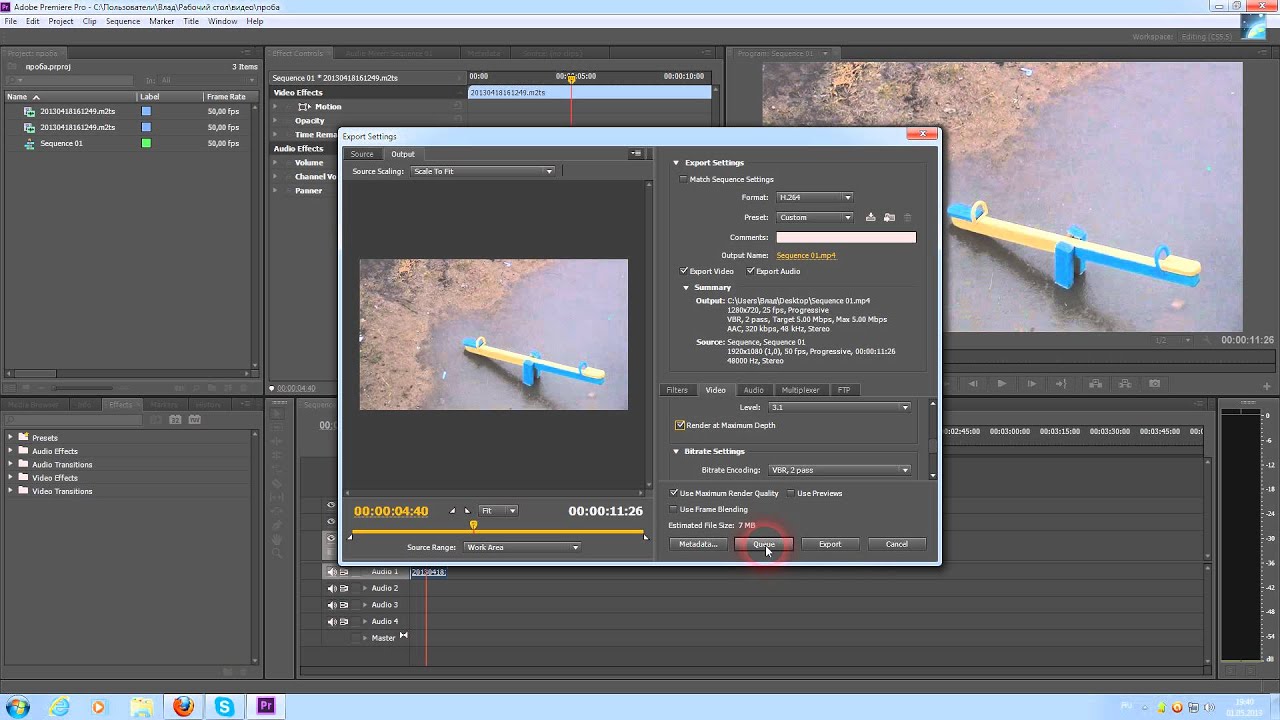
Download Adobe Premiere Pro CS6 Full Version Single Link Bagi kalian yang masih pemula pasti kebingungan Cara Render Video di Adobe Premiere Pro CS6, saya juga pertama bingung gimana Cara Render Video di Adobe Premiere Pro CS6 yang sudah saya edit. Pernah saya langsung coba export yang ada di menu file tapi lama sekali selesainya sampai berjam.
Adobe premiere pro cs6, render in hd YouTube
4. Render Audio. Fully living up to its name, this function will render just the audio within your selected work area. This option is great if you are working with lots of sound effects or music tracks, but very simple footage. By default, Adobe does not render audio automatically alongside the video and will need rendering separately.
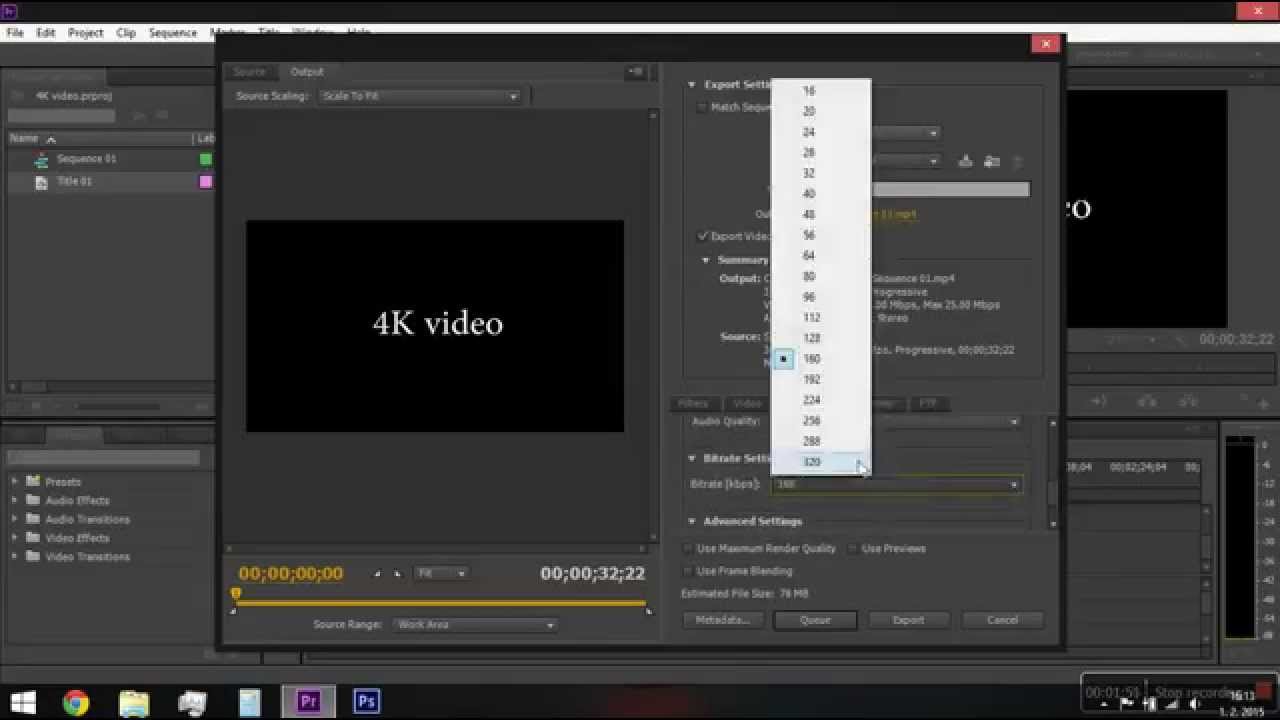
Adobe Premiere Pro CS6 4K video sequence and render settings YouTube
1. Buka Photoshop, pilih "File" "Open file", kemudian klik gambar pertama dan kotak "Image Sequence". 2. Pada kotak "Frame Rate" yang ditampilkan, tentukan jumlah frame per detik yang diinginkan. Kotak drop-down menawarkan beberapa opsi, tetapi Anda juga bisa menetapkan sendiri nomor yang diinginkan. Setelah itu, klik " OK ".

2 Cara Rendering Video Di Adobe Premiere Pro CS6 (mengubah project menjadi video)
Ikuti langkah berikut ini untuk mengimpor klip video ke dalam proyek: Klik File. Klik Import. Pilih video yang ingin Anda impor. Klik Open. 4. Klik video yang ingin dipotong dari tab "Project" dan seret ke Timeline. Klip video yang Anda impor ke Adobe Premiere Pro bisa ditemukan di panel Project, di bawah tab Libraries.

Cara Render Video di Adobe Premiere Pro CS6 Dengan Cepat Blog Yansas
You can change this default so that Premiere Pro automatically renders audio previews whenever it renders video previews. Select Edit > Preferences > General (Windows) or Premiere Pro > Preferences > General (Mac OS). Select or deselect Render Audio When Rendering Video. Click OK.

Cara Render Premiere Pro 1080p Render Settings for Adobe Premiere Pro CS6 YouTube / While
Disana tertulis NVIDIA GeForce 940MX, berarti gua menggunakan vga buatan NVIDIA dengan seri GeForce 940MX. Ingat ingat apa nama vga kita tadi, lalu kita buka folder tempat adobe premiere pro bersarang, biasanya ada di C://Program Files/Adobe/Adobe Premiere Pro CS6 lalu jika kalian menggunakan gpu dari NVIDIA maka cari file cuda_supported_cards.txt dan jika menggunakan RADEON carilah file.
Cara Render Video di Adobe Premiere Pro CS6 Dengan Cepat Blog Yansas
Daftar Isi : 1 Penjelasan Lengkap: Cara Render Video Di Adobe Premiere Cs6. 1.1 - Cara render video di Adobe Premiere CS6 adalah salah satu proses penting dalam penyuntingan video; 1.2 - Render adalah proses pembuatan file video yang siap diputar, yang disebut file output; 1.3 - Untuk melakukan render video di Adobe Premiere CS6, Anda harus membuat proyek dan menambahkan klip